




Blogs
How to Brine Chicken Before Cooking and Why It Matters
Brining is one of those kitchen habits that once you build it becomes completely automatic. It takes very little time, requires almost no equipment and makes a consistently noticeable difference to the juiciness, seasoning and overall quality of the finished chicken. Yet it is one of the most commonly skipped steps in home cooking.
This guide covers what brining actually does, the difference between wet and dry brining, how to do both correctly and the most common mistakes to avoid. Whether you are grilling, roasting, pan-frying or baking, brining is the step that makes the result consistently better.
What Brining Does to Chicken
When chicken sits in a brine, the salt works its way into the meat over time. The result is chicken that is seasoned from the inside rather than just on the surface. This makes a genuine difference to the flavour of the finished dish. Every bite tastes seasoned rather than just the exterior.
Beyond flavour, brining helps the chicken retain moisture during cooking. Brined chicken is noticeably more forgiving on the grill or in the oven. Even if it cooks a few minutes longer than intended, it stays juicier than unbrined chicken would under the same conditions. This is particularly useful for leaner cuts that can turn dry quickly over high heat.
The Chicken Stays Juicier
Bone-in chicken is wonderfully forgiving in a curry. The presence of the bone slows the cooking of the meat around it which means the chicken has more time to absorb the spices and the flavour of the masala before it is fully cooked. The result is meat that is tender, juicy and deeply seasoned all the way through.
This is why traditional Indian curries, the ones that have been made the same way for generations in home kitchens across the country, almost always use bone-in chicken. The cooks who developed these recipes understood instinctively that the bone protects the meat during the long simmer and that the result is a juicier, more tender piece of chicken in every bowl.
Wet Brine vs Dry Brine. What Is the Difference.
There are two approaches to brining and both work well. The choice between them depends on what you are cooking, how much time you have and the result you are after.
Wet brine
A wet brine is a solution of water and salt, sometimes with sugar and aromatics, that the chicken is submerged in for a period of time before cooking. It adds moisture as well as flavour and is particularly effective for lean cuts like boneless breast that benefit most from the extra juiciness. A wet brine is also well suited to grilling where the high heat can draw moisture out of the meat quickly.
Dry brine
A dry brine is simply salt applied directly to the surface of the chicken and left to work for a period of time before cooking. It is less effort than a wet brine, requires no bowl or container and is particularly effective for skin-on chicken where you want crispy skin. The salt draws out a small amount of surface moisture which then gets reabsorbed back into the meat along with the seasoning. The surface dries out in the process which means better browning and a crispier result when the chicken hits the heat.
How to Wet Brine Chicken
A basic wet brine needs only water and salt. Everything else is optional. A small amount of sugar is a useful addition as it encourages the chicken to brown more evenly during cooking and balances the saltiness of the brine without making the chicken taste sweet. Aromatics like garlic, peppercorns, bay leaves, fresh herbs or citrus peel can be added to infuse additional flavour into the meat.
Basic wet brine ratio:
- 4 cups cold water
- 3 tablespoons coarse salt or kosher salt
- 1 tablespoon sugar (optional)
- Aromatics of your choice (garlic, peppercorns, bay leaves, fresh herbs)
How to do it:
- Dissolve the salt and sugar in a small amount of warm water first, then add the cold water. The brine should be completely cold before the chicken goes in.
- Submerge the chicken completely in the brine. Use a plate or a small weight to keep it fully submerged if it floats.
- Cover and refrigerate for the appropriate time. Boneless breast: 1 to 2 hours. Bone-in pieces: 3 to 6 hours. A whole chicken: 12 to 24 hours.
- Remove the chicken from the brine, rinse lightly under cold water and pat completely dry with paper towels before cooking. A dry surface is essential for good browning and char.
How to Dry Brine Chicken
Dry brining is simpler than wet brining and is particularly effective for skin-on pieces and whole chickens where crispy skin is a priority. The only ingredient you need is coarse or kosher salt. Fine table salt can work but tends to be harder to control in terms of quantity so coarse salt is the more reliable choice.
How to do it:
- Pat the chicken completely dry with paper towels before applying the salt.
- Sprinkle salt evenly over all surfaces of the chicken including under the skin if it is a skin-on piece. Use approximately half a teaspoon of salt per 500g of chicken as a starting guide.
- Place the chicken on a rack over a tray and refrigerate uncovered for at least 30 minutes. For the best result, leave it overnight. The uncovered refrigeration helps the surface dry out further which produces better browning and crispier skin.
- There is no need to rinse a dry-brined chicken before cooking. Simply cook as planned and season lightly at the end if needed.
Which Cuts Benefit Most From Brining
Every cut of chicken benefits from brining to some degree but the difference is most pronounced in leaner cuts that are most at risk of turning dry during cooking. Boneless Chicken breast benefits enormously from a wet brine before grilling or roasting. Skin-on thighs and drumsticks respond particularly well to a dry brine which draws moisture away from the surface and results in noticeably crispier skin. A whole chicken benefits most from an overnight dry brine which gives the salt time to penetrate all the way through the bird.
Bone-in pieces generally need more time in the brine than boneless pieces because the bone slows the rate at which the salt penetrates the meat. Always give bone-in cuts more time regardless of which method you use.
Common Mistakes to Avoid
- Over-brining. Leaving chicken in a wet brine for too long causes the texture to become soft and unpleasant. Stick to the recommended times for each cut and do not be tempted to extend them.
- Using fine table salt without adjusting the quantity. Fine salt is denser than coarse salt and the same volume of fine salt will make a significantly saltier brine. If fine salt is all you have, use roughly half the quantity the recipe calls for.
- Not patting the chicken dry after a wet brine. Removing the chicken from the brine and putting it straight on the grill or into the oven without drying the surface first means the excess moisture creates steam rather than char. Always pat thoroughly dry before cooking.
- Brining chicken that is already pre-seasoned or marinated. If your chicken has already been seasoned with salt in a marinade, adding a full brine on top will result in an overly salty result. Adjust accordingly or skip the brine.
- Skipping the rest after dry brining. The salt needs time to work its way into the meat. Thirty minutes is the minimum. Overnight is significantly better. The longer the rest the more noticeable the difference.
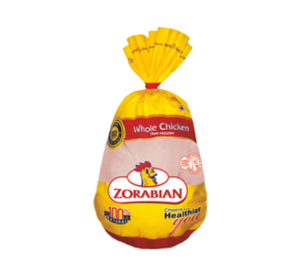
Order Zorabian’s Chicken portions from shop.zorabian.com and try brining before your next cook.